Google Cloud integration
The script sinergym/utils/gcloud.py included with Sinergym allows easy configuration and cloud execution of experiments using the Google Cloud API.
The main objective is to create a virtual machine (VM) using Google Cloud Engine (GCE) to run the Sinergym container. This remote container can update the Weights and Biases tracking server with artifacts if the experiment is configured with these options.
Once an instance completes its task, the container will automatically remove its host instance from the Google Cloud Platform if specified.
Google Cloud configuration
Prerequisites
First, set up your Google Cloud account and configured SDK (e.g., auth, project ID, permissions). Additional information is available here.
Then, it is required to have Docker installed in order to manage containers in Google Cloud. You can link Google Cloud with Docker as follows (see authentication methods):
$ gcloud auth configure-docker
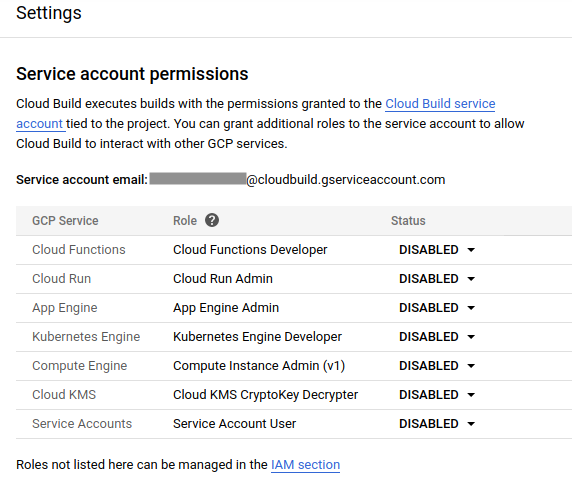
To avoid future issues with image build and Google Cloud permissions, you must allow permissions for Google Cloud build (more information here).
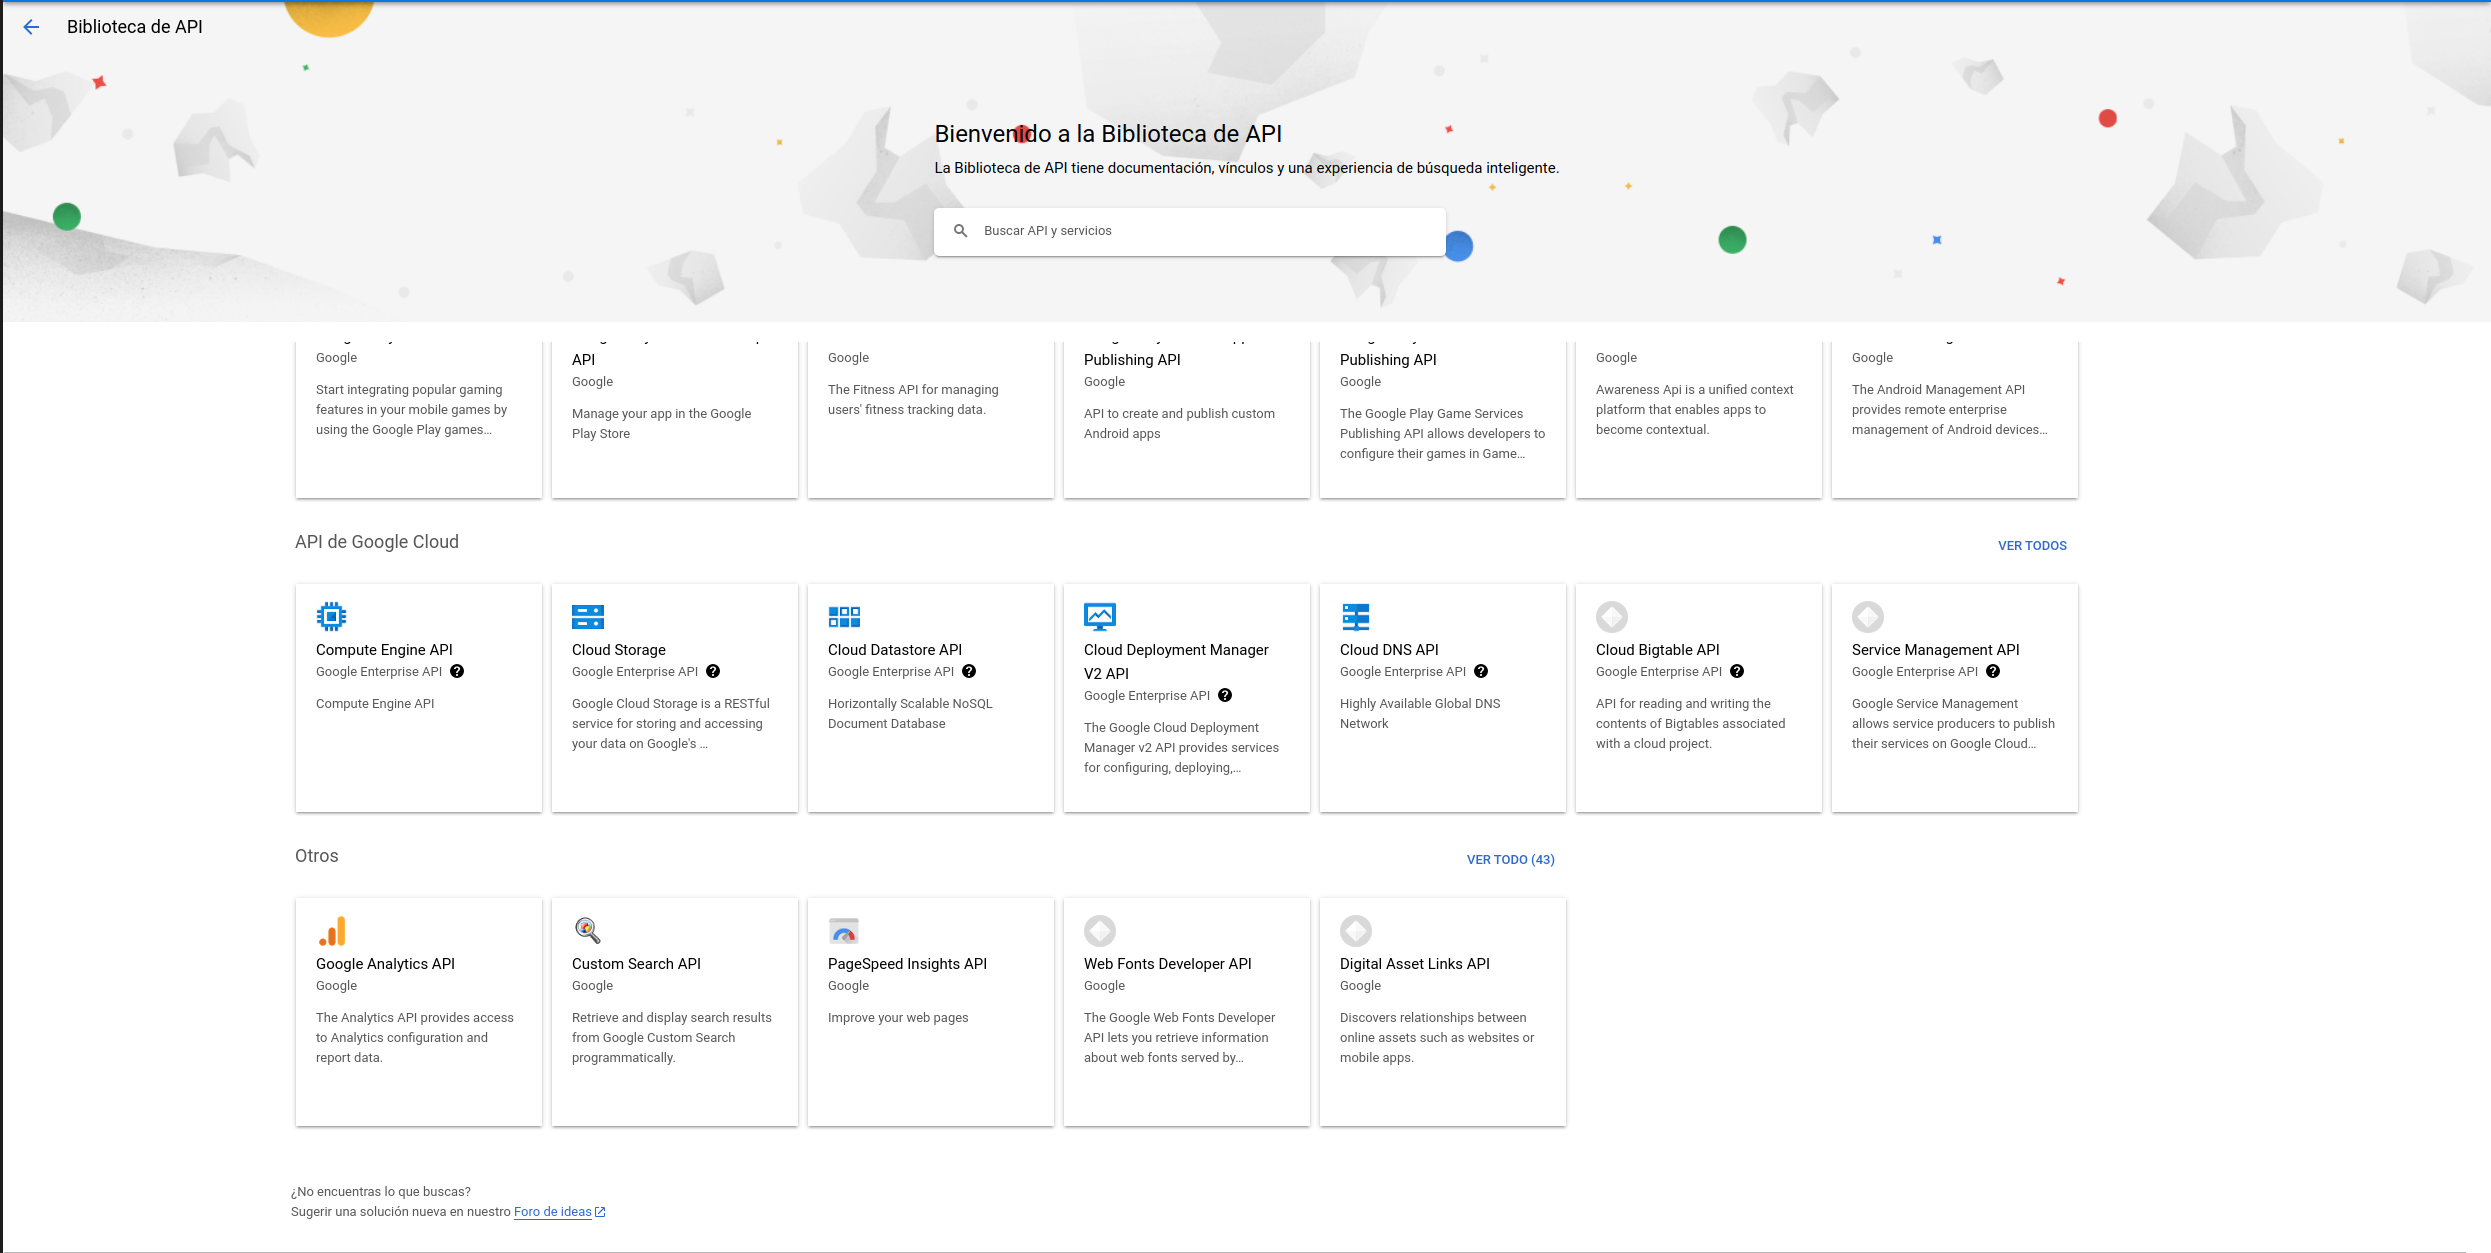
It is also required to enable Google Cloud services in the API library. You can allow these services in your Google account using the gcloud client SDK or the Google Cloud Platform Console:
Google Container Registry API.
Artifact Registry API
Cloud Run API
Compute Engine API
Cloud Logging API
Cloud Monitoring API
Cloud Functions API
Cloud Pub/Sub API
Cloud SQL Admin API
Cloud Firestore API
Cloud Datastore API
Service Usage API
Cloud storage
Gmail API
$ gcloud services list
$ gcloud services enable artifactregistry.googleapis.com \
                         cloudapis.googleapis.com \
                         cloudbuild.googleapis.com \
                         containerregistry.googleapis.com \
                         gmail.googleapis.com \
                         sql-component.googleapis.com \
                         sqladmin.googleapis.com \
                         storage-component.googleapis.com \
                         storage.googleapis.com \
                         cloudfunctions.googleapis.com \
                         pubsub.googleapis.com \
                         run.googleapis.com \
                         serviceusage.googleapis.com \
                         drive.googleapis.com \
                         appengine.googleapis.com
If Sinergym and optional dependencies such as SB3 are installed, the Google Cloud SDK must be linked with other Python modules for some functionalities to work. Execute the following command in your terminal:
$ gcloud auth application-default login
Use the predefined container in Google Cloud
Our Sinergym container is currently uploaded to the Artifact Registry as a public image. You can use it locally or on a GCE VM.
$ docker run -it eu.gcr.io/sinergym/sinergym:latest
$ gcloud compute instances create-with-container sinergym \
    --container-image eu.gcr.io/sinergym/sinergym \
    --zone europe-west1-b \
    --container-privileged \
    --container-restart-policy never \
    --container-stdin \
    --container-tty \
    --boot-disk-size 20GB \
    --boot-disk-type pd-ssd \
    --machine-type n2-highcpu-8
We also have containers available in Docker Hub. You can consult them in our repository
Note
It is possible to change parameters to set up your own VM according to your preferences (see create-with-container).
Warning
The --boot-disk-size is essential. By default, the VM sets 10GB, which is insufficient for the Sinergym
container. This results in a silent error for Google Cloud Build.
Use your own container
If you have forked this repository and want to upload your own container to Google Cloud and use it, you can utilize cloudbuild.sh along with our Dockerfile for this purpose:
#!/bin/bash

# Default values
PROJECT_ID="sinergym"
REGION="europe-west1"
REPOSITORY="sinergym"
IMAGE_NAME="sinergym-image"
TAG="latest"
EXTRAS="drl gcloud"

# Override default values with provided arguments
while getopts p:r:R:i:t:e: flag
do
    case "${flag}" in
        p) PROJECT_ID=${OPTARG};;
        r) REGION=${OPTARG};;
        R) REPOSITORY=${OPTARG};;
        i) IMAGE_NAME=${OPTARG};;
        t) TAG=${OPTARG};;
        e) EXTRAS=${OPTARG};;
    esac
done

# Authenticate with Google Cloud
gcloud auth configure-docker ${REGION}-docker.pkg.dev

# Build the container image
docker build -t ${REGION}-docker.pkg.dev/${PROJECT_ID}/${REPOSITORY}/${IMAGE_NAME}:${TAG} --build-arg "SINERGYM_EXTRAS=${EXTRAS}" .

# Push the image to Artifact Registry
docker push ${REGION}-docker.pkg.dev/${PROJECT_ID}/${REPOSITORY}/${IMAGE_NAME}:${TAG}
The following actions are performed:
Authenticate with Google Cloud SDK.
Builds the image locally, with parameters definition.
Pushes the built image to the Artifact Registry.
Do not confuse the options section at the end of the file with the virtual machine configuration. Google Cloud uses a helper VM to build everything mentioned above. We use this YAML file to upgrade our container because the PROJECT_ID environment variable is defined by the Google Cloud SDK, so its value corresponds to your current project in the Google Cloud global configuration.
Warning
If your local computer does not have enough free space, it might report the same error explained in the previous section.
In order to use the configuration in cloudbuild.sh, do the following:
$ ./cloudbuild.sh -p PROJECT_ID -r REGION -R REPOSITORY -i IMAGE_NAME -t TAG -e EXTRAS
-e option is the optional available package groups in Sinergym. By default, the container is built with the value 'drl gcloud'.
Create your VM or MIG
To create a VM using this container, use the following command:
$ gcloud compute instances create-with-container sinergym \
    --container-image eu.gcr.io/sinergym/sinergym \
    --zone europe-west1-b \
    --container-privileged \
    --container-restart-policy never \
    --container-stdin \
    --container-tty \
    --boot-disk-size 20GB \
    --boot-disk-type pd-ssd \
    --machine-type n2-highcpu-8
Note
The option --container-restart-policy never is essential for proper operation.
To create a Managed Instance Group (MIG), first create a machine template:
$ gcloud compute instance-templates create-with-container sinergym-template \
--container-image eu.gcr.io/sinergym/sinergym \
--container-privileged \
--service-account storage-account@sinergym.iam.gserviceaccount.com \
--scopes https://www.googleapis.com/auth/cloud-platform,https://www.googleapis.com/auth/devstorage.full_control \
--container-env=gce_zone=europe-west1-b,gce_project_id=sinergym \
--container-restart-policy never \
--container-stdin \
--container-tty \
--boot-disk-size 20GB \
--boot-disk-type pd-ssd \
--machine-type n2-highcpu-8
Note
The --service-account, --scopes, and --container-env parameters will be explained
in the Containers permission to bucket storage output. Please, read that documentation
before using these parameters, as they require prior configuration.
Then, create a managed instance group:
$ gcloud compute instance-groups managed create example-group \
    --base-instance-name sinergym-vm \
    --size 3 \
    --template sinergym-template
Note
If you encounter issues with VM initialization, check your quotas here.
Initiate your VM
Your virtual machine is now ready. To connect, you can use SSH (see gcloud-ssh):
$ gcloud compute ssh <machine-name>
Google Cloud uses a Container-Optimized OS (see documentation) within the VM. This OS has Docker pre-installed with the Sinergym container.
To use this container on your machine, simply run:
$ docker attach <container-name-or-ID>
Now you can execute your own experiments in Google Cloud. For example, you can enter the remote container with gcloud ssh and execute the train_agent.py script for the desired experiment.
Executing experiments in remote containers
The train_agent.py and load_agent.py scripts are used to execute experiments and evaluations in remote containers. These scripts can be combined with features such as Google Cloud Bucket, Weights and Biases, and the auto-remove functionality.
Note
The train_agent.py script can also be used for local experiments and sending output data and artifacts to remote storage, such as WandB, without configuring cloud computing.
The YAML structure for configuring experiments or evaluations is explained in the Usage section.
Warning
To ensure correct auto-deletion, it is recommended to use MIGs instead of individual VM instances.
To visualize remote logs in real time, log in Weights & Biases with your GitHub account.
Containers permission to bucket storage output
To enable the remote_store option in train_agent.py to work correctly, the Sinergym template in the Create your VM or MIG section specifies the --scope, --service-account, and --container-env parameters. These parameters provide the necessary permissions for each container to write to the bucket and manage Google Cloud Platform.
To set up the service account and grant the required privileges, follow the steps below:
Create a new service account named storage-account:
$ gcloud iam service-accounts create storage-account
Grant the roles/owner permission to the service account:
$ gcloud projects add-iam-policy-binding PROJECT_ID --member="serviceAccount:storage-account@PROJECT_ID.iam.gserviceaccount.com" --role="roles/owner"
Create a JSON key file named
google-storage.jsonin the project root directory (this file should be ignored by git):
$ gcloud iam service-accounts keys create PROJECT_PATH/google-storage.json --iam-account=storage-account@PROJECT_ID.iam.gserviceaccount.com
Export the path to the JSON key file as the GOOGLE_CLOUD_CREDENTIALS environment variable on your local computer:
$ export GOOGLE_CLOUD_CREDENTIALS=PROJECT_PATH/google-storage.json
These steps ensure that the gcloud SDK uses the specified token for authentication.
Google Cloud Alerts
Google Cloud Platform provides functionality to trigger events and generate alerts. We have created a trigger in our gcloud project to notify when an experiment is finished. This alert can be received through various channels such as Slack, phone, or e-mail. Additional information about how to set up alerts, refer to the Google Cloud Alerts documentation here.